ZARİF ATELIER
THE ELEGANT VOLUME OF DEEP YELLOW: WE'RE SEWING CULOTTES
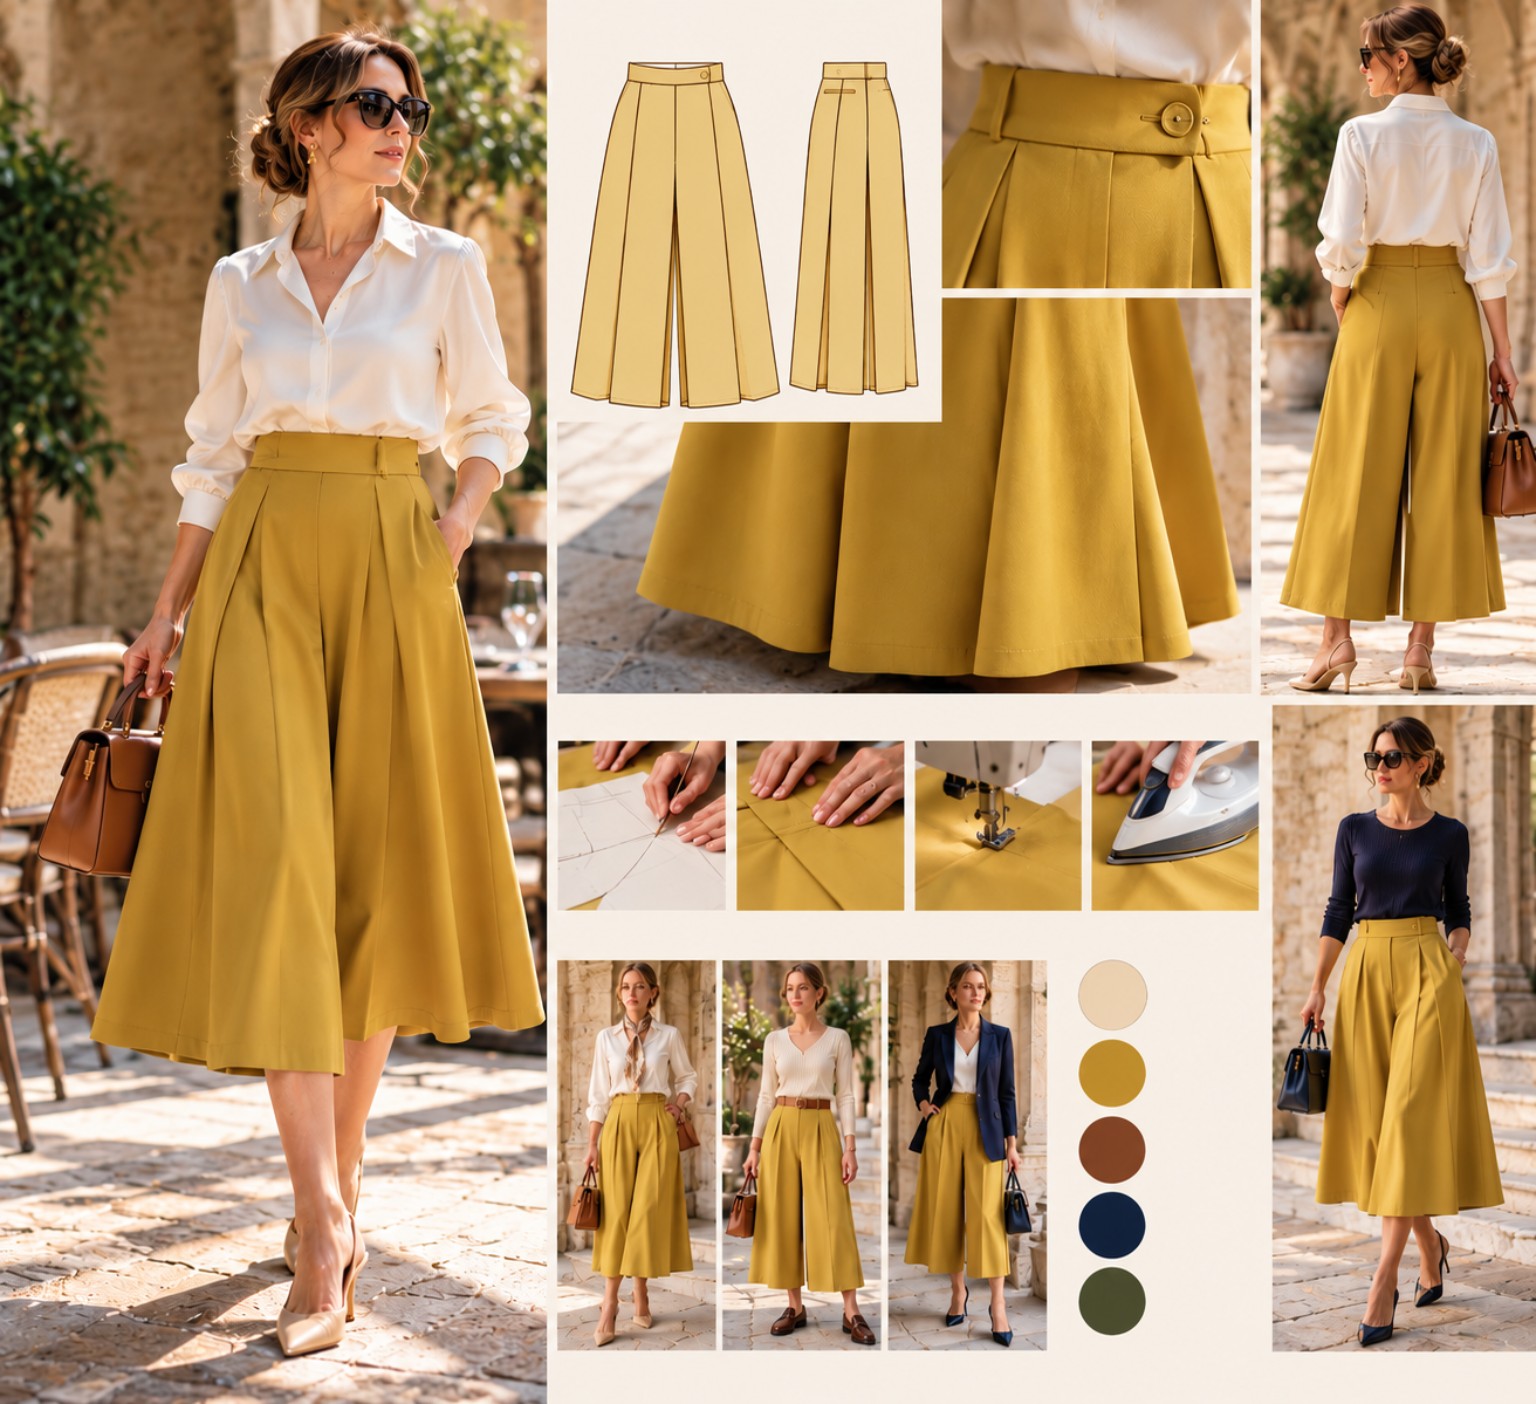
This October in Zarif Atelier, we make with our own hands a piece we first met in our Fashion & Style pages — strong, yet wonderfully easy to wear: midi-length culottes.
As fluid and feminine as a skirt, as comfortable as trousers, this design owes its character to two things: the clean tailored line at the waist and the generous volume that opens out towards the hem. From the front, deep pleats draw attention away from the trouser shape, creating something very close to a midi skirt. As you walk, the two wide legs part, and the piece reveals itself as trousers after all.
OUR COLOUR: DEEP YELLOW
For this design we chose deep yellow over the classic camel. Edging towards mustard without tipping too far into brown, carrying a golden warmth, this shade belongs to autumn, yet never weighs the look down.
Worn with white and ecru it is luminous; with navy, more urban; with chestnut and cognac leather accessories, it becomes a warm October look. So although the culottes themselves carry a strong colour, they become a surprisingly easy piece to pair within the wardrobe.
WHAT SHOULD THE FABRIC BE?
Because the beauty of this design lies in its volume, the choice of fabric matters enormously. It should be neither too thin and floaty nor stiff and heavy. We want it substantial enough to hold the pleats, and fluid enough to open as you walk.
A medium-weight wool-blend crêpe, a gabardine with a full drape, a good-quality viscose-blend woven, or a tailoring fabric with a touch of elastane are all suitable choices. A very thin viscose can deflate the design's shape; a heavy coating fabric, on the other hand, makes the legs stiffer than they should be.
Before buying, try a small test: fold the fabric into a pleat in your hand, then let go. If the crease holds nicely but the fabric falls softly back down under its own weight, you are in the right territory for this design.
READING THE PATTERN
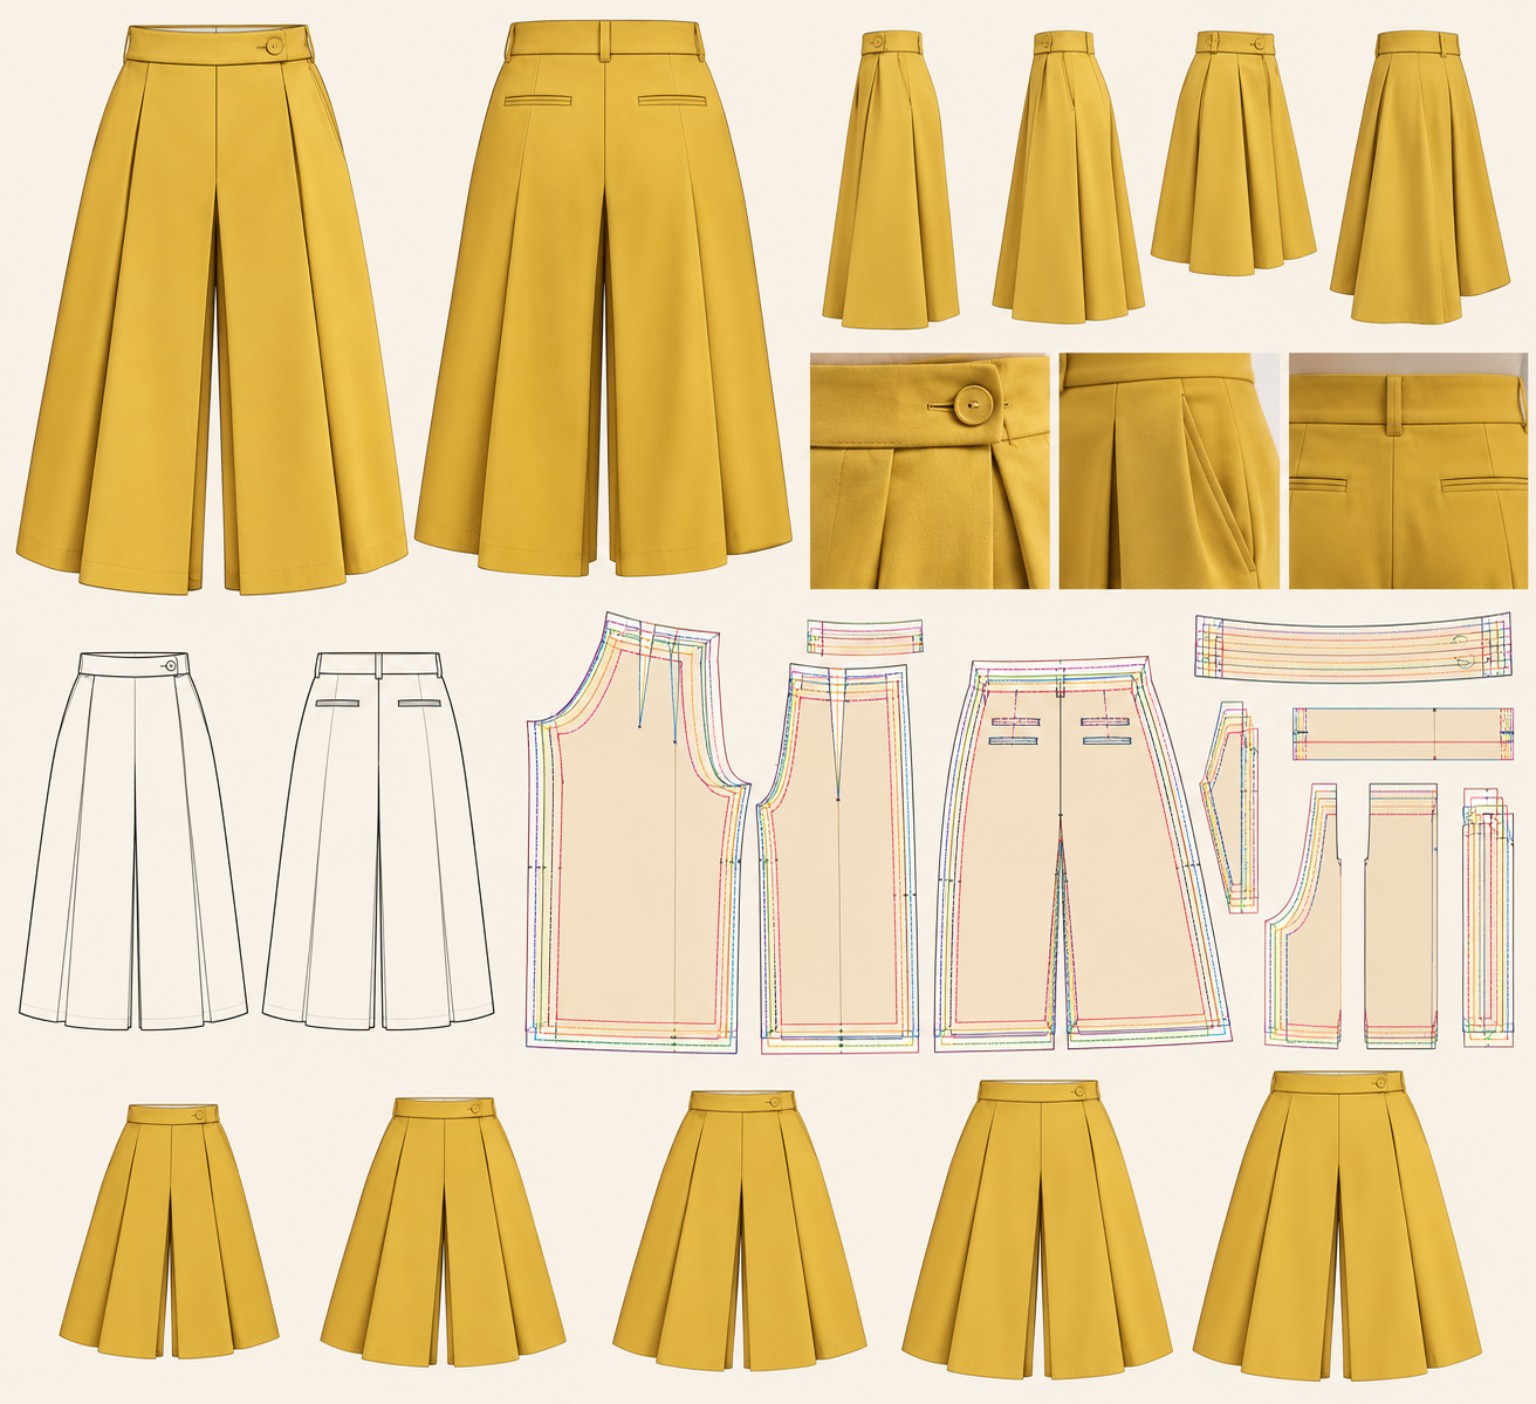
The main pieces of our pattern are the trouser front, the trouser back and the waistband. If you are adding pockets, the pocket bags and any supporting pieces are prepared separately. On a multi-size pattern, each size is marked with its own line; it is important to follow the line for your size from start to finish as you cut.
The design is high-waisted. The deep pleats at the front are not merely decorative; they give the culottes their characteristic width. The back is kept calmer, so that despite the volume at the front, no unnecessary fullness builds up around the waist and hips.
When laying the pattern on the fabric, always keep to the straight grain. In a design with legs this wide especially, even a slight twist of the pieces on the fabric can make the legs pull in different directions in the finished garment.
Before cutting, compare your waist, hip and finished-length measurements with the pattern. Remember that a midi length will not fall at the same point on everyone; adjusting the length along the pattern's lengthen/shorten line, rather than simply trimming the hem, preserves the silhouette far better.
SEWING ORDER
First, close the pleats on the front pieces according to the pattern markings and press them. Here, pressing matters as much as sewing: rather than flattening the pleats into knife-sharp folds, we want to set them in a controlled way only at the top, and let the fabric open out again below.
The pockets are prepared and set into the front pieces. Then the fronts and backs are joined, and the inside-leg and side seams are closed. Once the crotch seam is finished, the true volume of the trousers begins to emerge.
The waistband is prepared and attached to the body. A well-fitting waist is one of the most important tailoring points of this design, because this is precisely the part that balances the voluminous silhouette below. Once the fastening is complete, the whole garment is tried on again.
In the final stage, we decide on the hem length. Ours is a midi: not a long palazzo. This proportion, sitting above the ankle, means it can be worn with heels as well as loafers, slingbacks or ankle boots.
Before hemming, it pays to let the garment hang for a while, then check again how high each leg sits from the floor. In the final press, the waist and upper section are left crisp, while the legs opening out below are left soft and full of movement.
ZARİF ATELIER
Among Golden Branches: A Floral Cloth in Chinese Needle Stitch
Yellow tulips, pink carnations, turquoise blooms and olive-green leaves… In this design, inspired by Semiha Hanım's embroidery, the flowers are linked by curling golden branches. The fan-shaped blue flower at the centre brings movement to the composition, while a fine golden band framing all four sides of the cream cloth completes the work with a single, simple line.
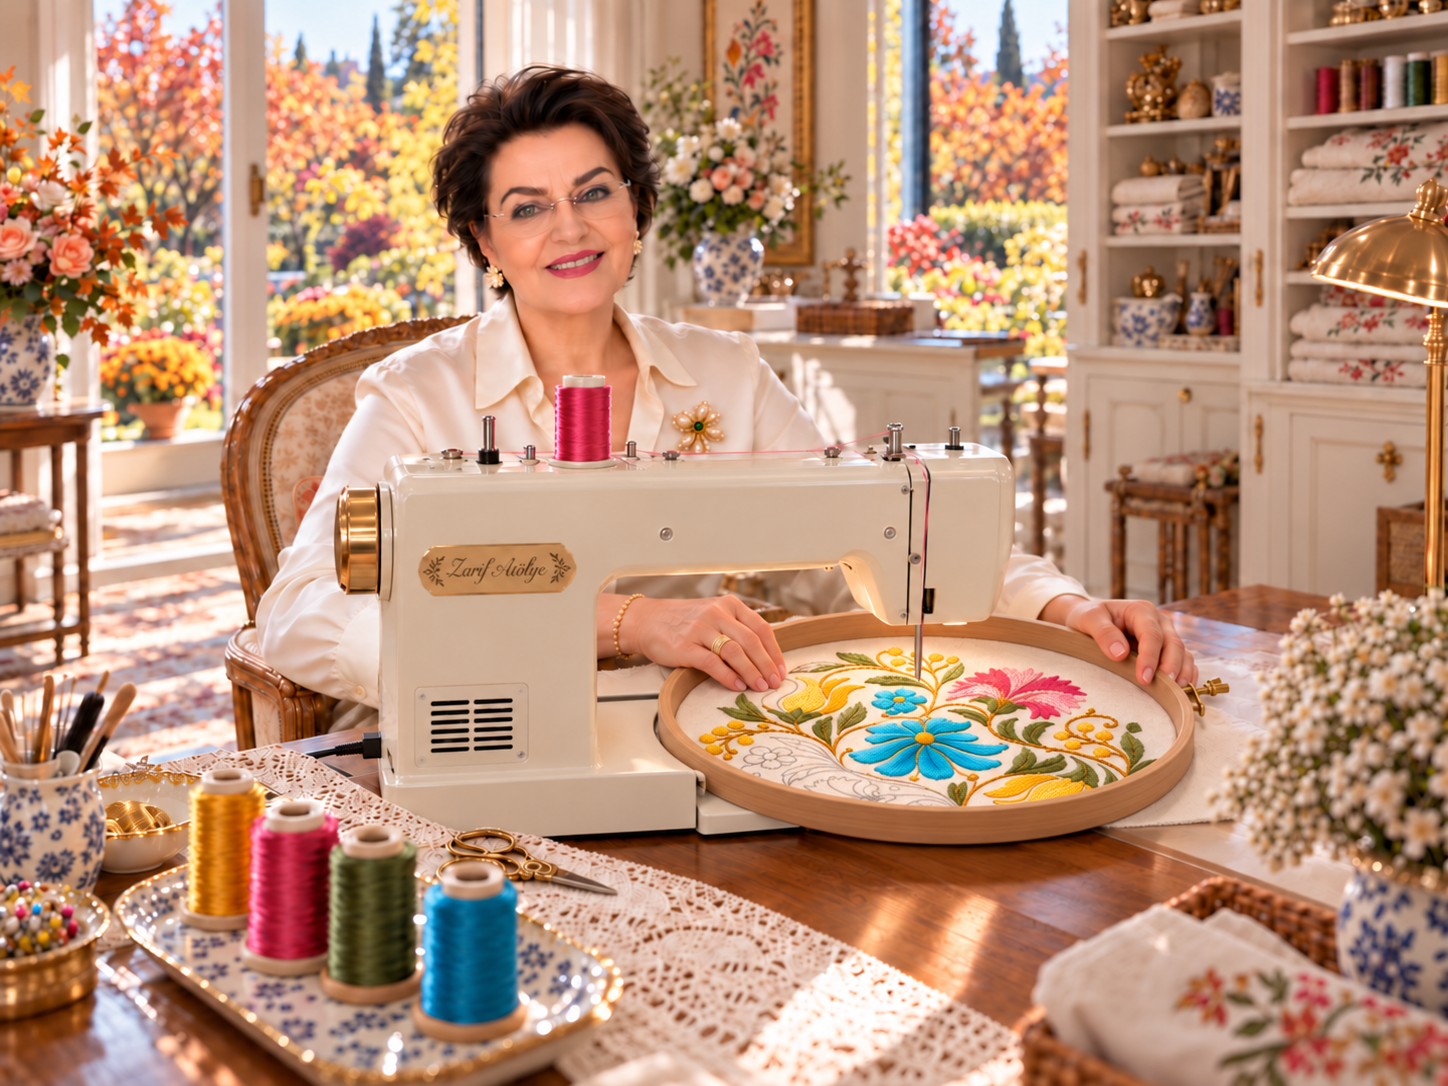
We are working this cloth on a domestic sewing machine using the Chinese needle (long-and-short) stitch technique. The long and short stitches interlocking with one another blend the colour tones and give the flowers and leaves soft shading.
Choosing the Fabric: A Ground to Carry the Design
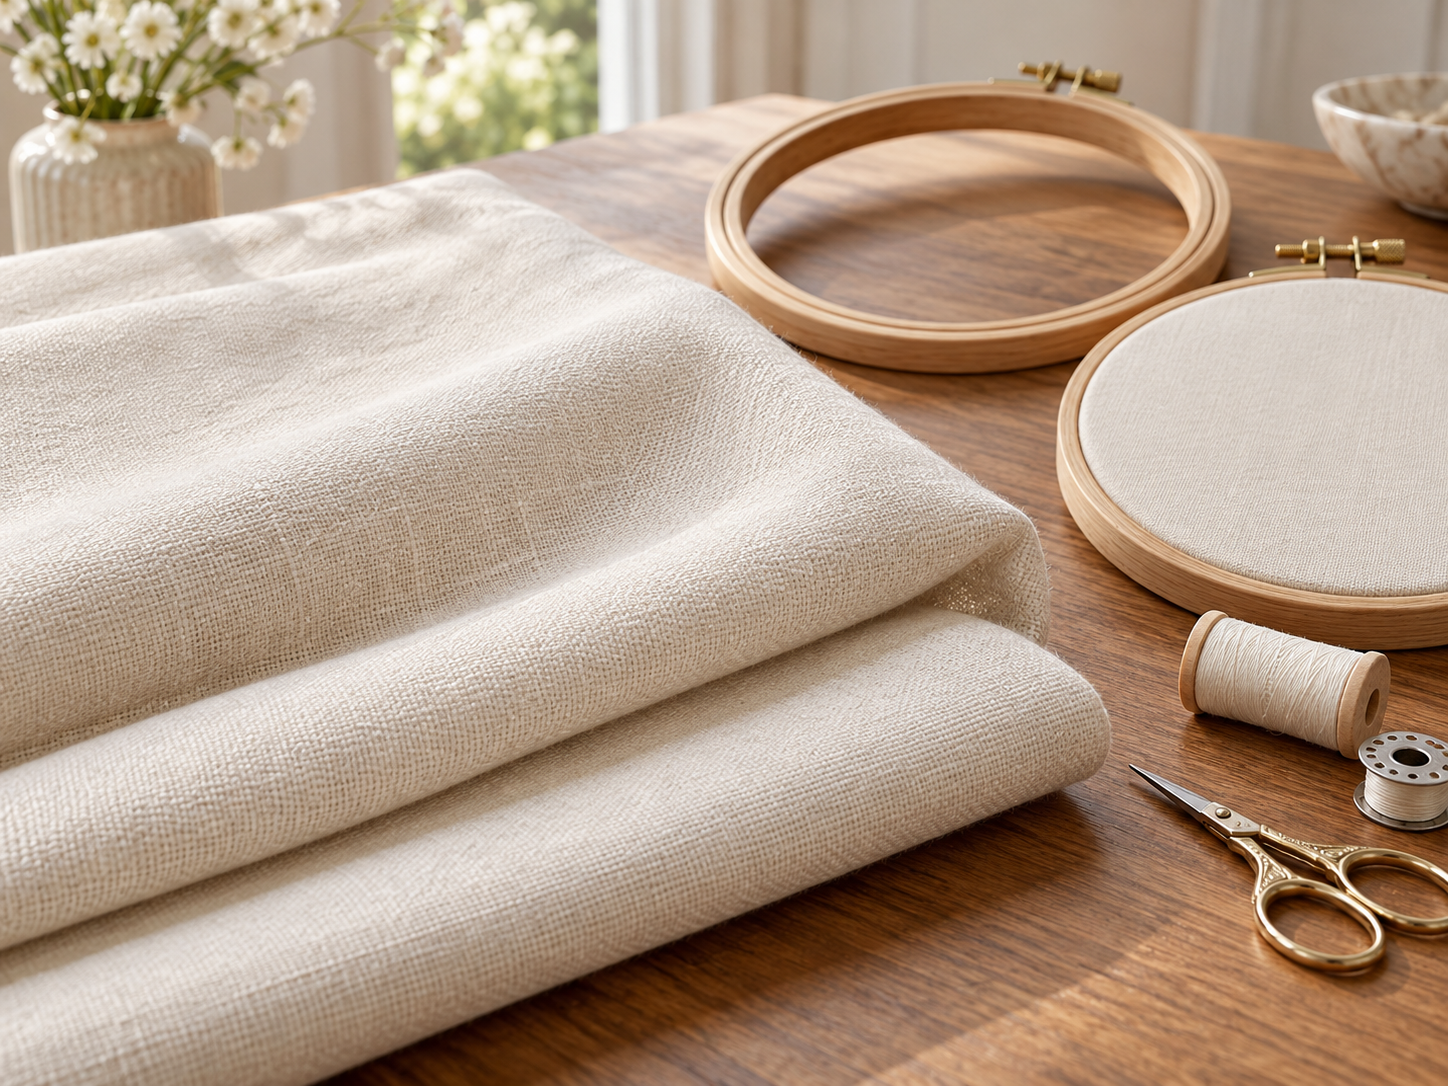
Chinese needle stitch can be worked on a variety of fabrics. When making a cloth, however, it becomes important that the fabric holds its body, drapes beautifully and can carry the density of the embroidery.
For this piece we recommend a light cream or off-white, closely woven, smooth-surfaced, medium-weight cotton–linen blend table linen. A fabric with a soft drape yet enough body makes the finished cloth all the more beautiful. A very loosely woven or stretchy surface can make the fine branches and small flowers harder to work.
We decide the size of the cloth according to where it will be used. For a coffee table, for example, a cloth with a finished size of 90 × 90 cm works well; we cut the fabric with a hem allowance added to each side. We prepare the fabric by pre-washing and pressing it according to its care instructions.
Materials
• Light cream or off-white cotton–linen blend table linen
• A domestic sewing machine suitable for hoop embroidery
• A round, double-ring embroidery hoop that moves freely under the machine
• Coloured viscose/rayon machine embroidery threads on spools
• Golden-yellow metallic thread suitable for machine embroidery
• Fine bobbin thread
• Polyester sewing thread in the fabric colour for the hems
• A machine needle suited to the fabric and thread
• The raw pattern template (on this page)
• A fabric-appropriate pattern transfer pen or embroidery transfer paper
• Small embroidery scissors, a ruler and an iron
Choosing Thread: Colour and Shimmer
For the flowers and leaves we use viscose/rayon machine embroidery thread on spools. Its gentle sheen makes the tonal transitions created by Chinese needle stitch visible. Choosing colours from the same thread range makes it easier to keep thickness and lustre consistent.
For the curling branches, selected flower outlines and the fine border, we prefer a golden-yellow metallic thread suitable for machine embroidery. These are also sold under the label "metallic embroidery thread".
The golden yellow of the tulips and the metallic gold play different roles. The yellow embroidery thread forms the fill of the flowers; the metallic thread adds shimmering lines to the design.
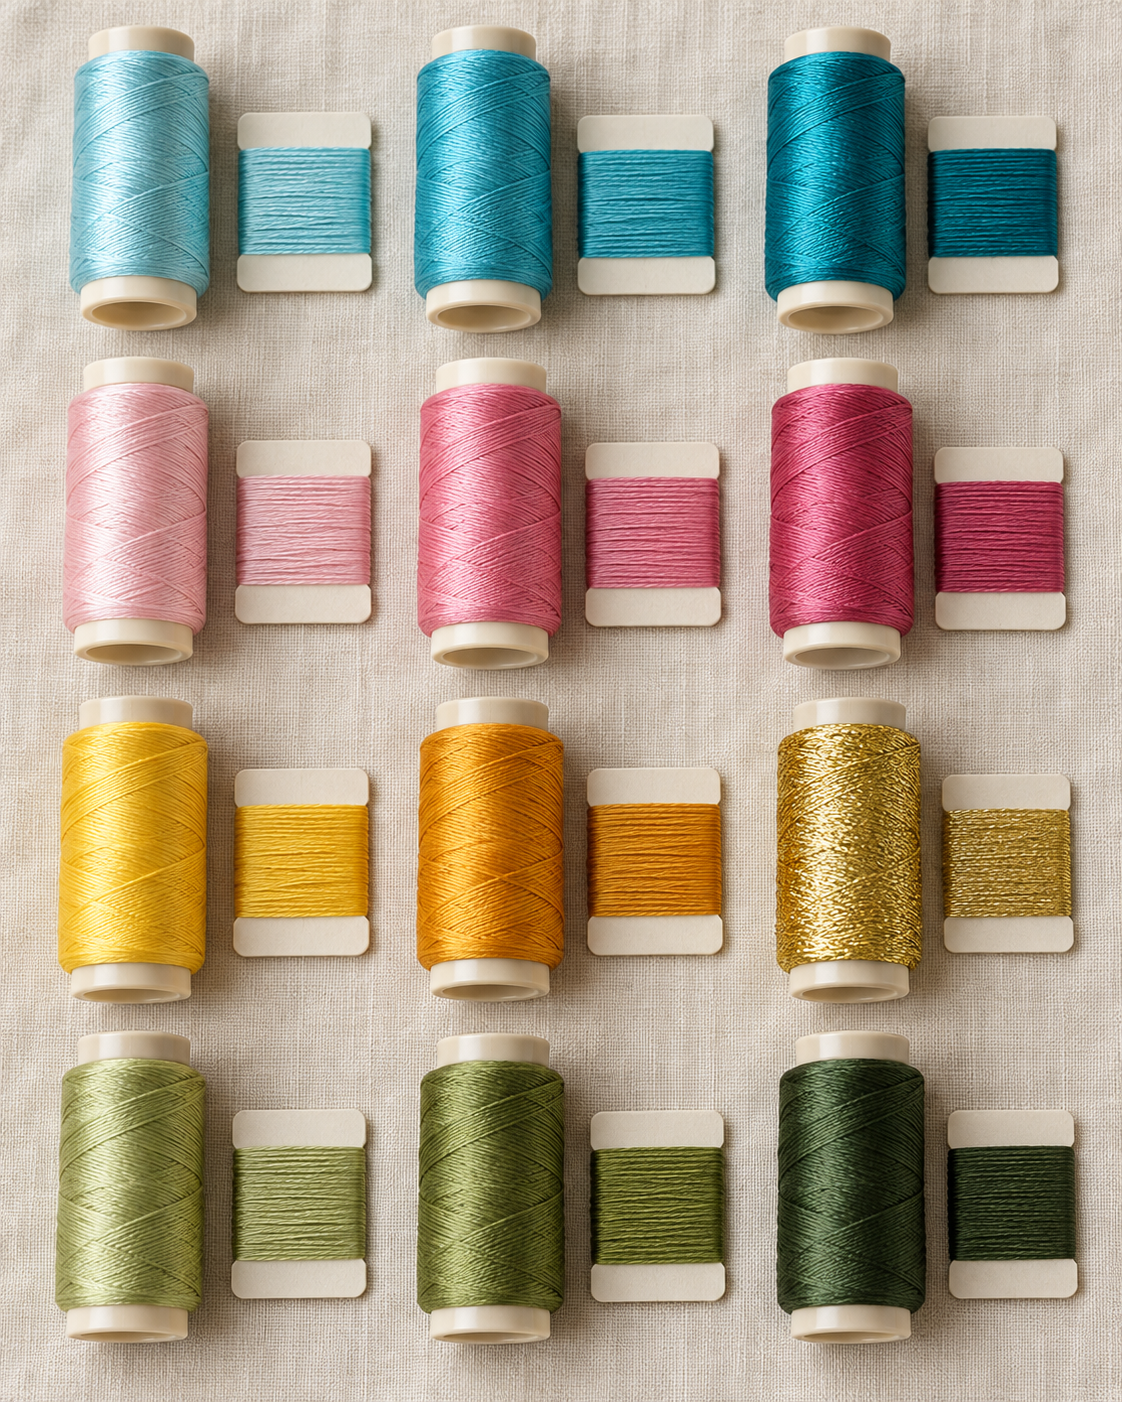
| Colour family | Shades to choose | Where to use |
|---|---|---|
| Blue | Light turquoise, bright turquoise, deep turquoise | The central fan flower and the small blue flowers |
| Pink | Powder pink, rose pink, deep pink | Carnations |
| Yellow | Golden yellow, amber yellow | Tulips and the small yellow flowers |
| Green | Light olive, olive green, dark olive | Leaves and the bases of the flowers |
| Metallic gold | Golden yellow | Curling branches, fine accents and the border |
We settle on exact colour numbers from the shade card of the chosen thread range. Seeing the tones side by side on the cloth fabric makes it easier to judge how well the colours sit with one another and with the ground.
Transferring the Design to Fabric
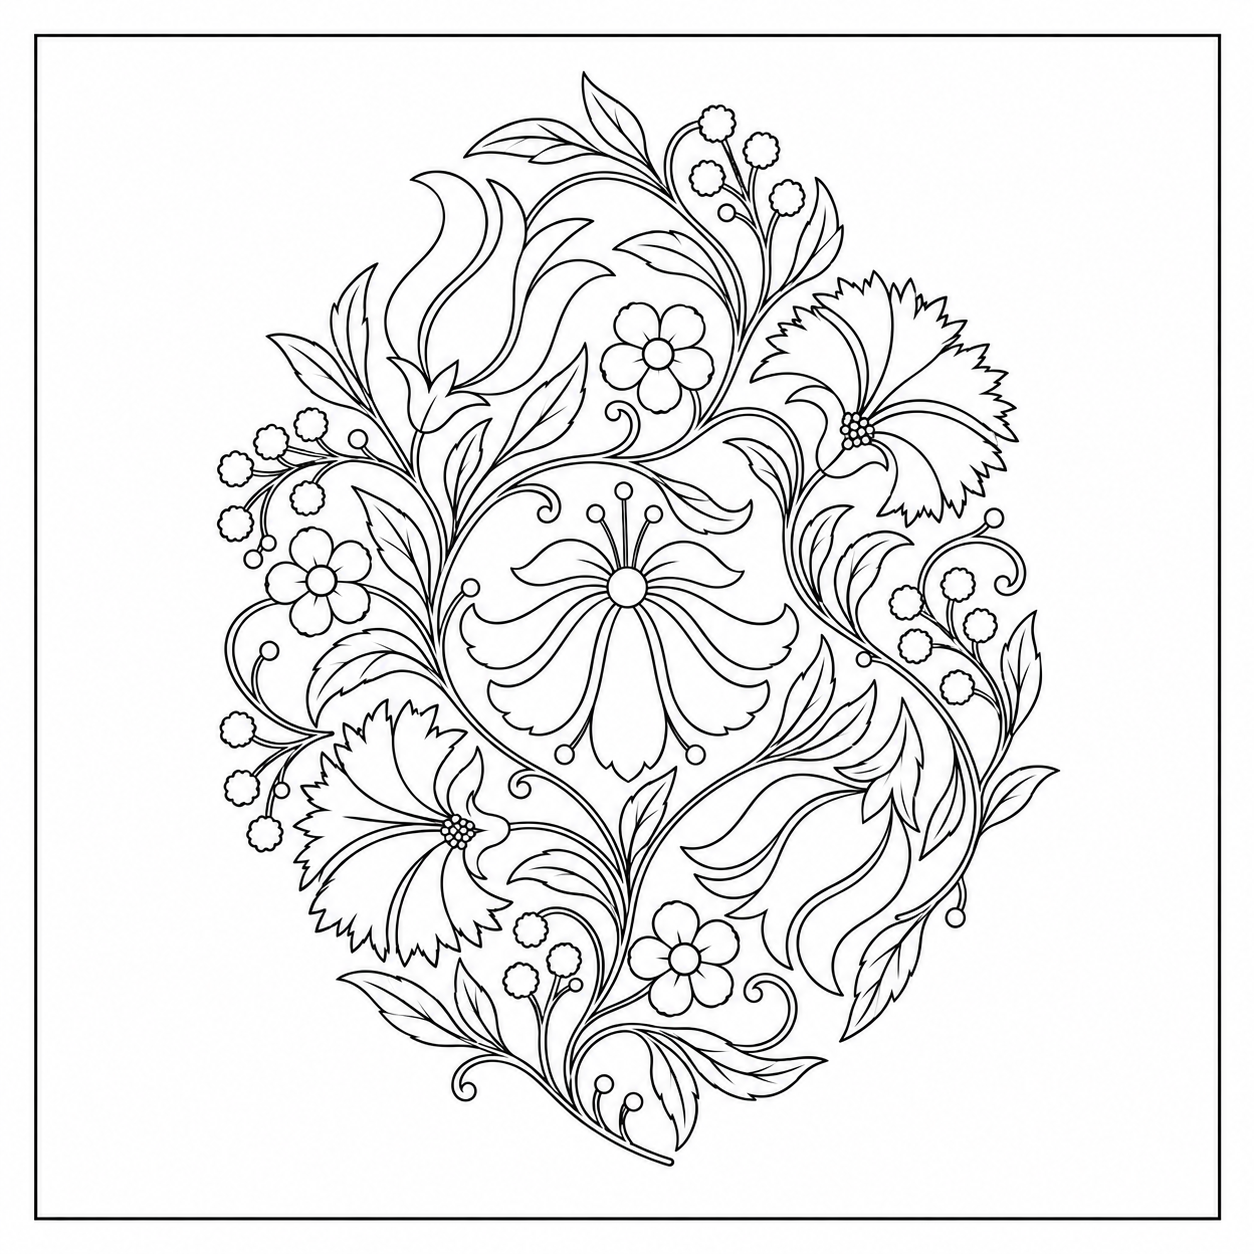
First we mark the centre of the cloth. When placing the oval floral motif, we leave enough space around it.
We set the border line at an equal distance from all four edges. We calculate this distance from the size after hemming; on a 90 × 90 cm cloth, a band about 4 cm in from the hemmed edge sits in good balance.
We scale the raw template on this page to the chosen size and transfer it to the fabric. The outlines of the flowers, the divisions between petals, the leaf veins and the curling branches should all be clearly visible. We first test the transfer material on a small scrap of fabric to check how its marks are removed.
Choosing and Fitting the Hoop
A round, double-ring embroidery hoop should hold the fabric at an even tension and stop it slipping as you work. A smooth wooden hoop or a suitable plastic one can be used.
We choose the hoop's diameter according to the working area of the motif and the space under the machine's arm. There is no need to fit the whole design into the hoop at once; large motifs can be worked section by section.
In machine embroidery, the hoop is fitted the opposite way round to hand embroidery: the fabric is set in the hoop so that it lies flat against the machine bed. We make sure the surface is flat, avoid stretching the weave by pulling it, and check that the hoop moves freely under the machine. When moving the hoop to a new position, we take care not to crush the embroidery already completed.
Preparing the Machine
We work Chinese needle stitch without the presser foot, directly with the needle. We remove the foot and disengage the feed dogs as described in the machine's manual. This way, it is not the machine that moves the fabric, but the hands guiding the hoop.
Once the needle, top thread and bobbin are ready, we work on a test piece of the same fabric. First a line, then the fill of a small leaf or petal.
We check that the top and bottom stitches are balanced, that the thread runs without breaking, and that the fabric does not pucker more than it should.
The Foundation of Chinese Needle Stitch: Interlocking Stitches
In Chinese needle stitch, the fill is built up with long and short stitches laid side by side. The stitches of each new row slip between those of the row before, unifying the surface. The absence of a hard line where the rows meet is the defining feature of this technique.
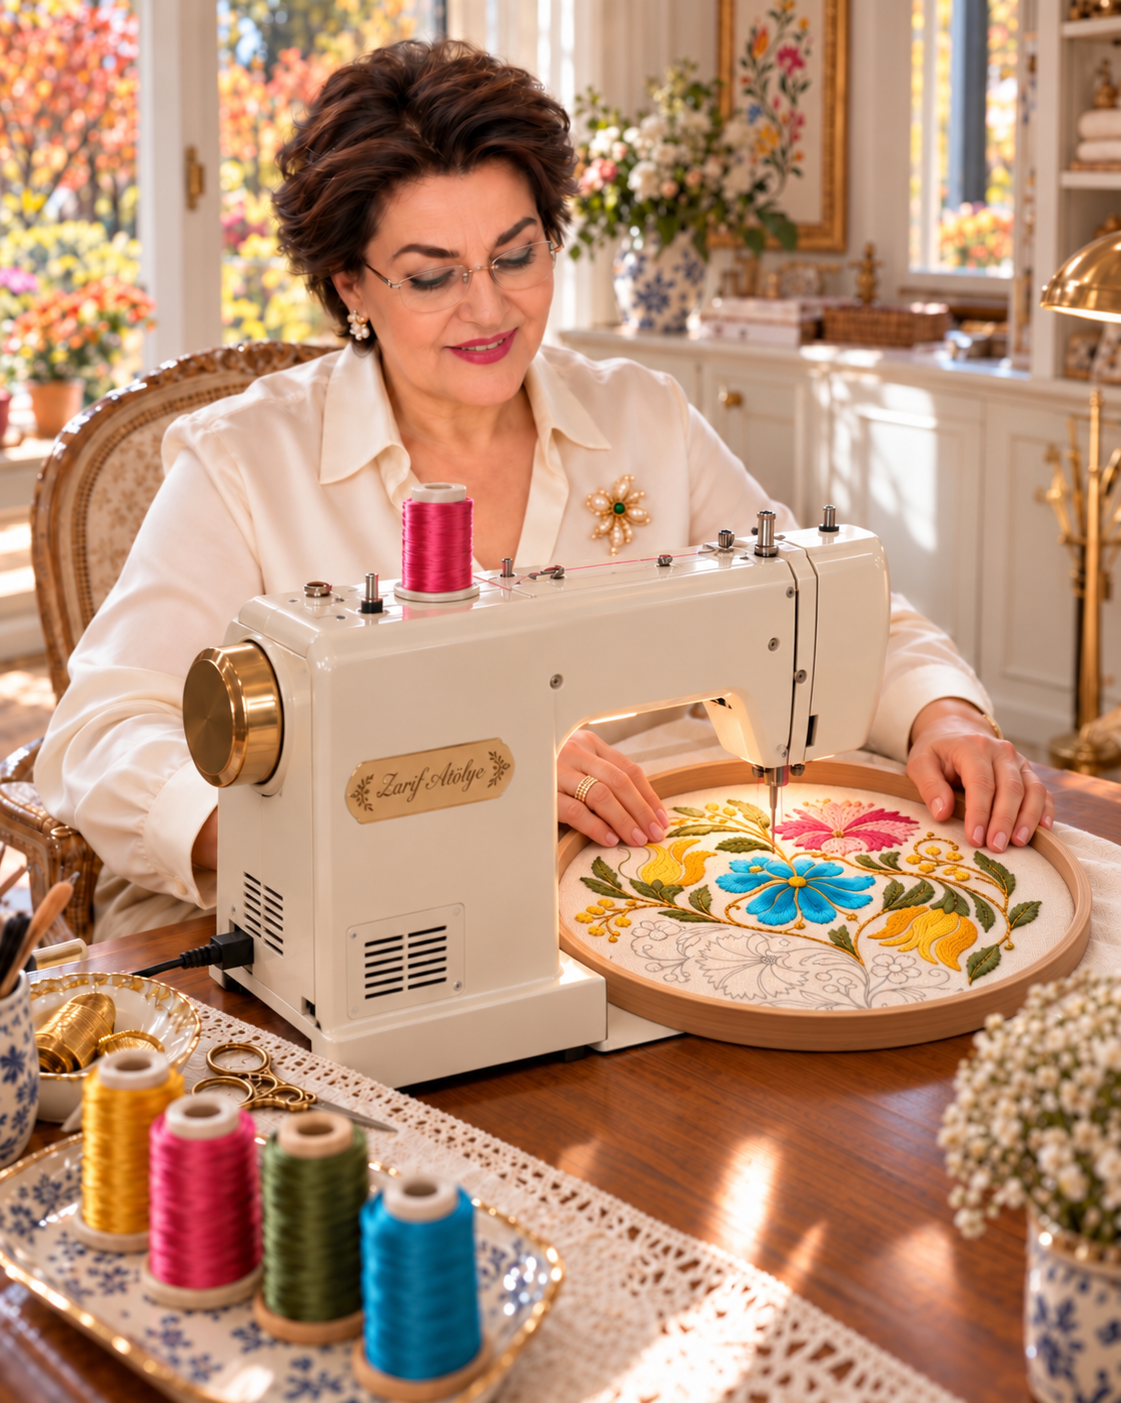
In the method Semiha Hanım describes, the fill along the edge of the leaf or flower is laid first. From there, you work inwards row by row. The end points of the stitches are not kept level; they are left long and short so that the next row can slip in between them.
The new colour is carried in between the stitches of the previous one, so that the light and dark tones blend softly. You work without leaving gaps between stitches and without over-filling the same spot again and again.
The direction of the stitches follows the shape of the motif. On petals it can fan outwards; on long leaves it can follow the line of the leaf. In some areas, straighter, more parallel directions can also be used.
Guiding the Hoop
On a domestic sewing machine, stitch length depends on the relationship between machine speed and the movement of the hoop. At the same machine speed, moving the hoop faster lengthens the stitches; moving it more slowly shortens them.
We guide the hoop with small, controlled movements, keeping our fingers on the rim of the hoop, well away from the needle. We soften the movement around the curves of the flowers and keep the fill density even across the whole area. A steady working rhythm helps the rows blend and the surface look smooth.
Working the Flowers and Leaves
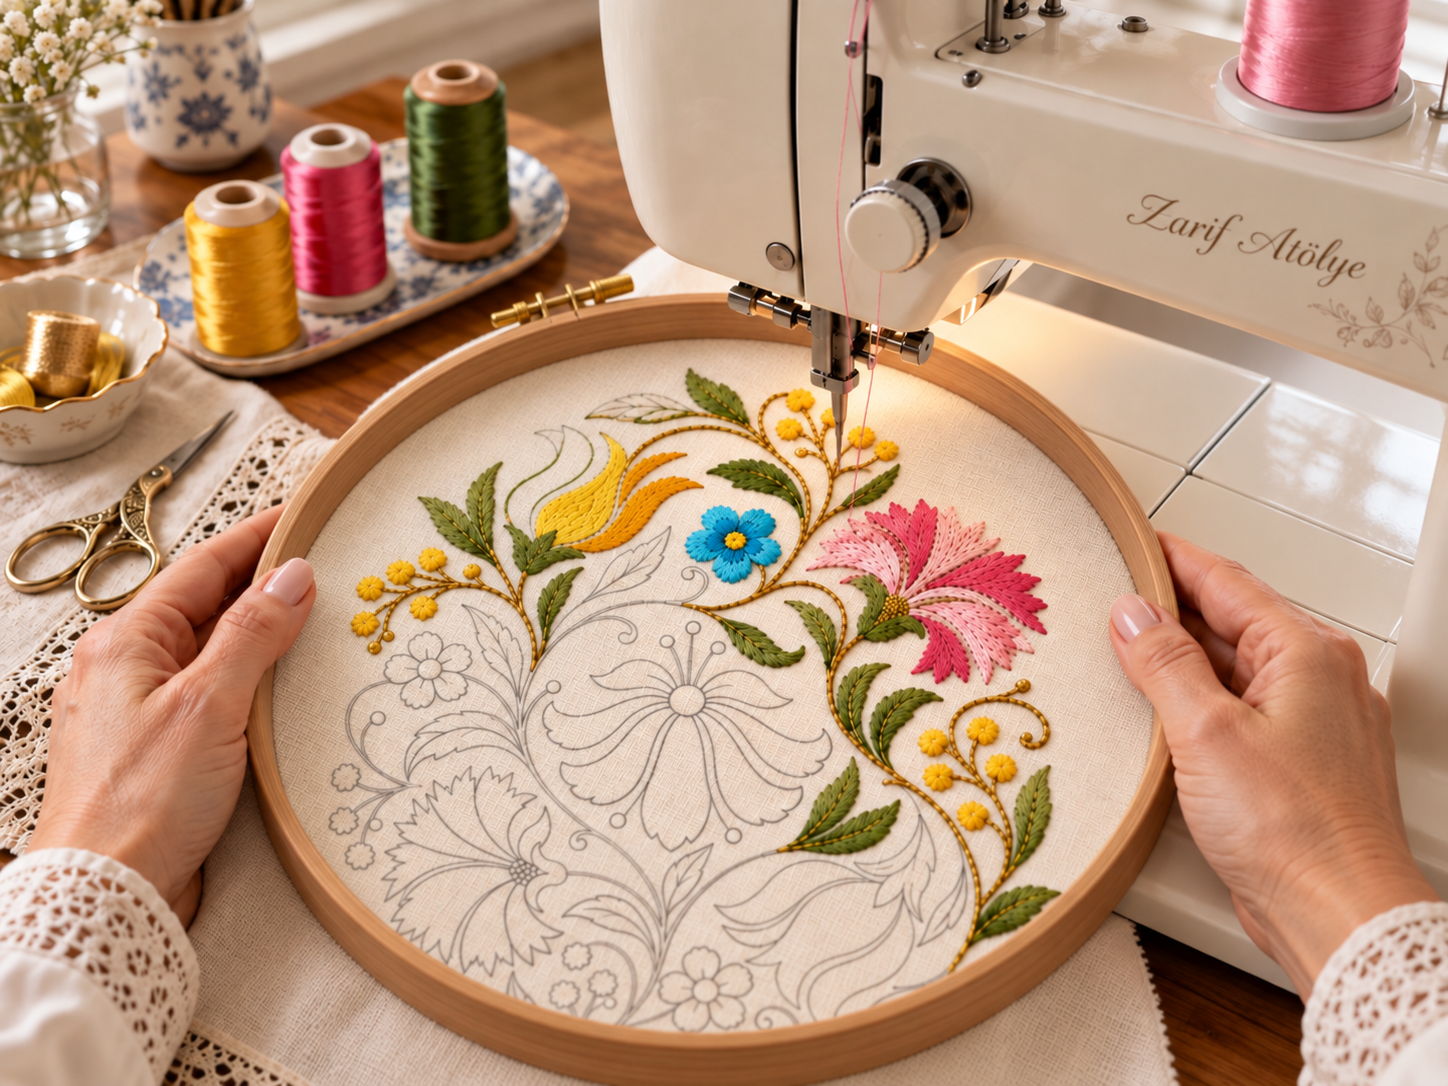
On the leaves, we use the light olive in the brighter areas and the dark green at the bases and along the shaded edges. We arrange the stitch direction to follow the shape of the leaf and soften the meeting of the tones with interlocking rows.
The main fill of the tulips is golden yellow. We build depth by using the amber tone at the bases of the flowers and in selected curves, while keeping the divisions between the petals clear.
On the carnations, powder pink, rose pink and deep pink are worked together. We follow the opening of the petals as we go, taking care that the serrated tips do not lose their definition.
On the central fan flower, we work the turquoise tones along the line of each petal. The blending of light and dark stitches strengthens the flower's curling form. We finish the coloured fills by completing the small blue and yellow flowers.
Golden Branches and Fine Accents
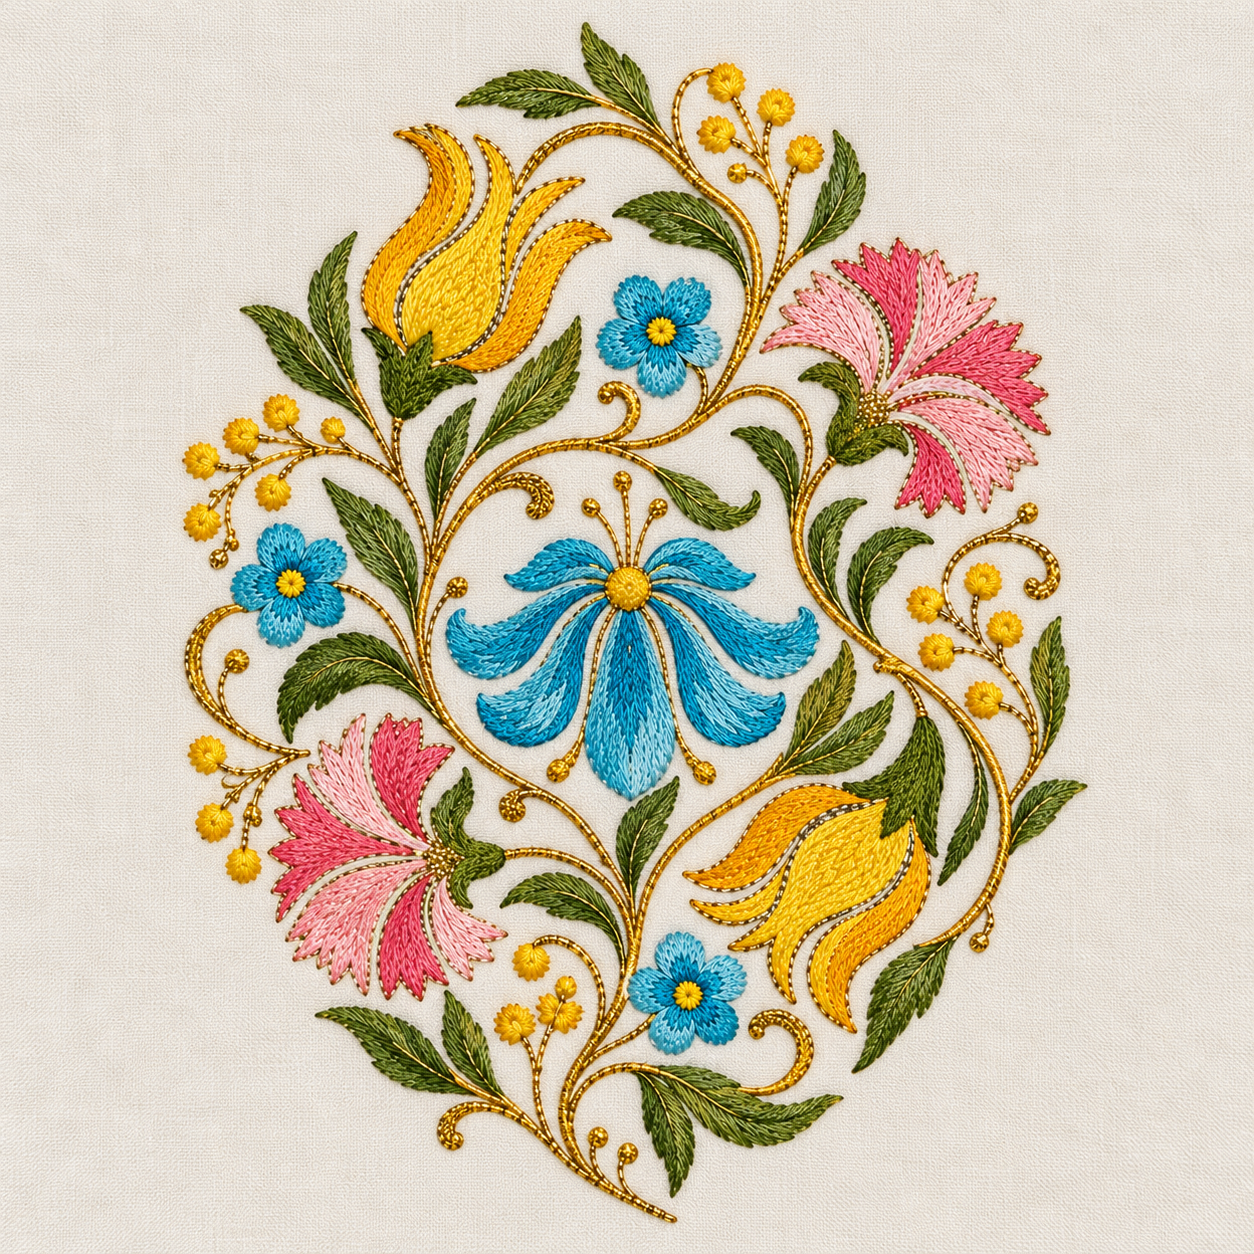
We complete the curling branches, selected fine lines around the flowers and the small golden details with metallic machine embroidery thread.
We work the metallic thread on a test piece first. Following the thread's recommendations, we choose a suitable needle, lower the speed and adjust the tension. Keeping the golden lines fine ensures the coloured fills remain visible.
A Simple, Single-Band Border
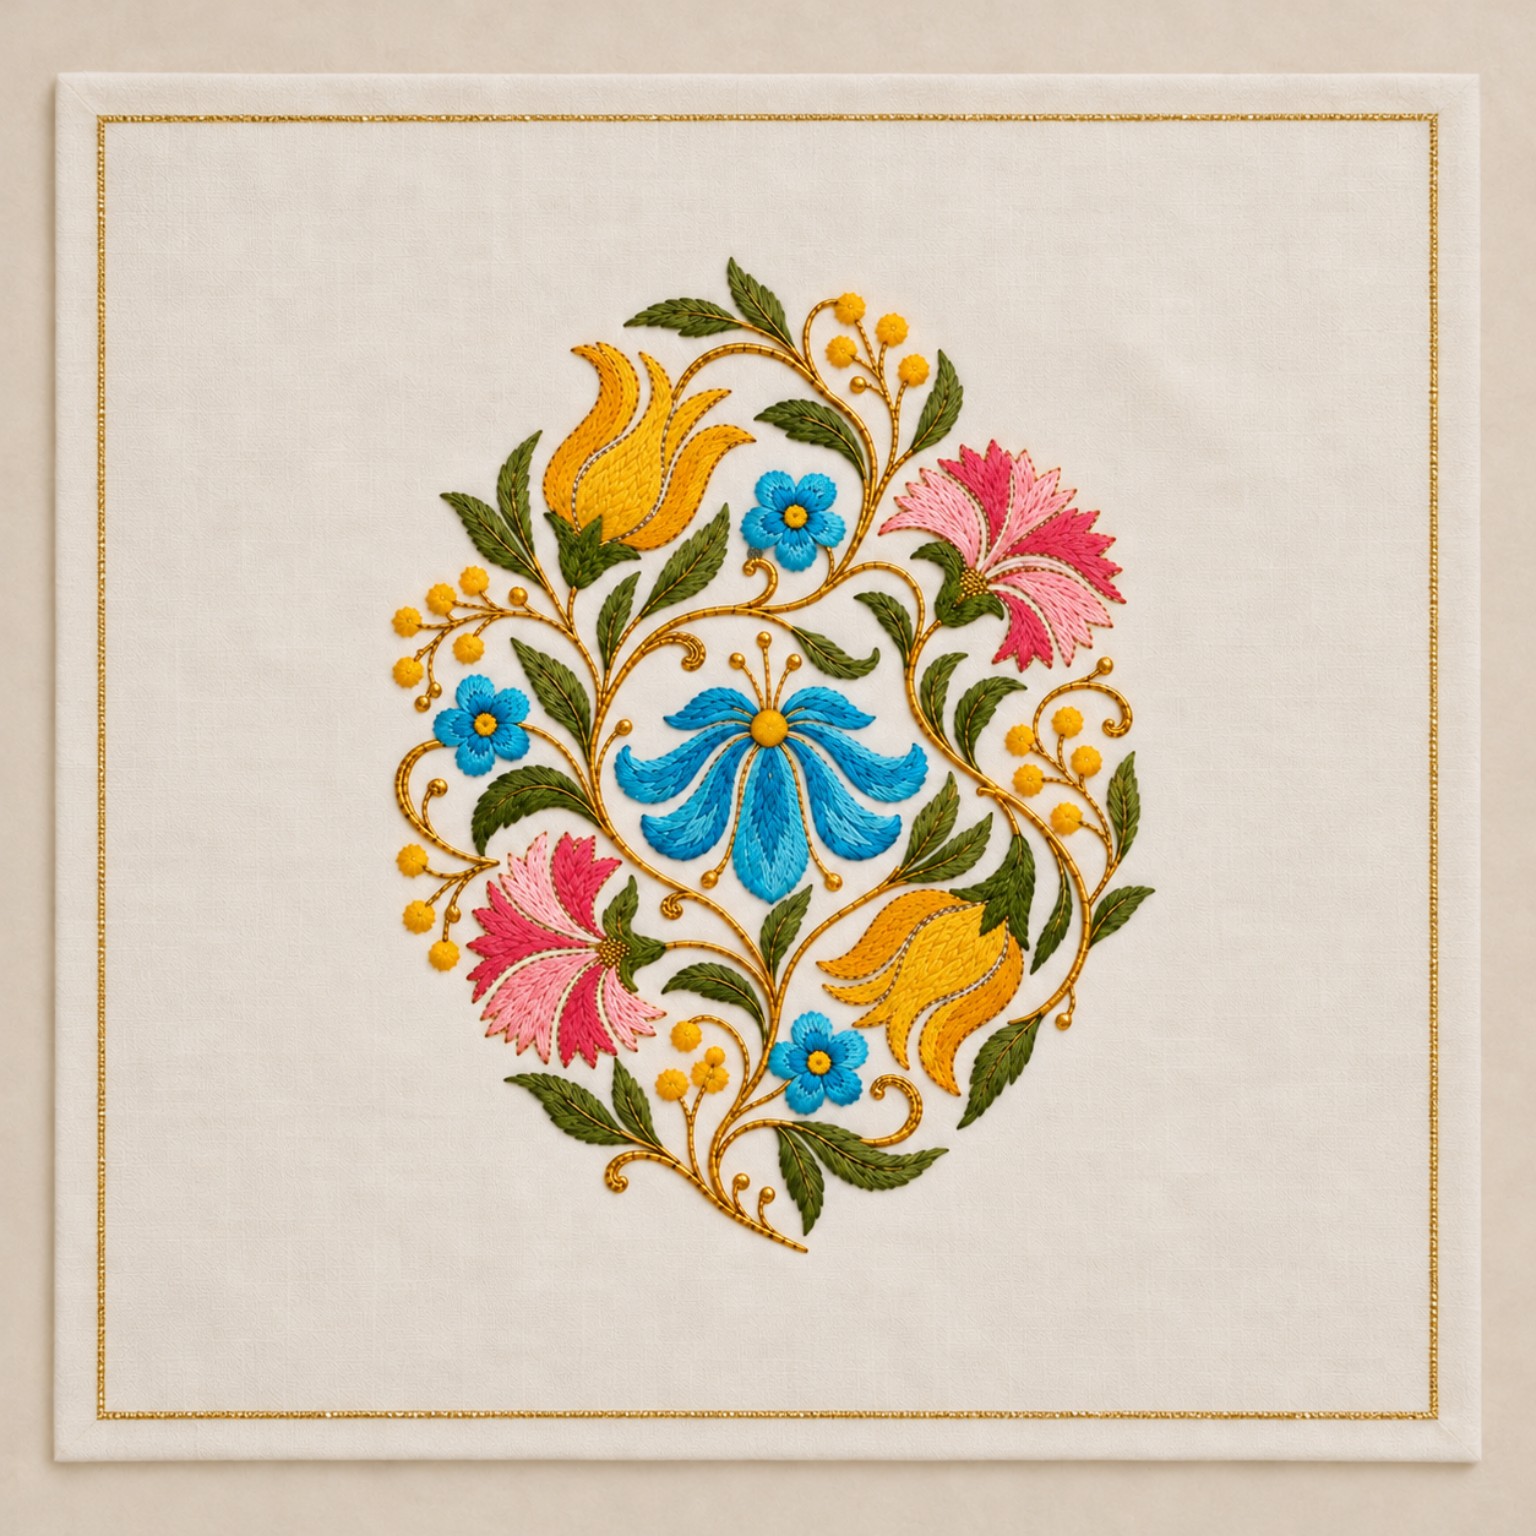
A fine, unbroken golden band runs along all four sides of the cloth. We work the border without the hoop: we take the fabric out of the hoop and re-engage the machine's feed dogs.
We check the border's distance from the edges with a ruler, keeping the same width on all four sides. We form the band with a narrow satin stitch or a close zigzag, whichever the machine supports. Because metallic thread is more prone to breaking in dense stitching, we try it on a test piece first and work the border at a slow speed. At the corners, we turn with care so that the line meets neatly.
Finishing Touches
We secure the thread ends and trim away any loose tails with small scissors. We finish the hems with sewing thread in the fabric colour, and remove the transfer marks according to the instructions of the product used.
We give the final press at a temperature suited to the care requirements of the fabric and threads, on the reverse side and through a pressing cloth. To protect the texture of the embroidery, we place a soft towel underneath.
To care for the cloth and protect the viscose and metallic threads, we prefer a gentle wash in cold water; we dry the cloth flat without wringing it.